Plastering is often the thin dividing line between an attractive home with beautiful walls and a badly kept one. It is many a time considered to be an art, one reason why even the most diehard DIY people prefer to call in local expert and professional plasterers for a job. For example, if you are a resident of Melbourne, Australia and have plastering to be done, what will be your natural inclination? To rush out and hire one of the top Plastering companies in Melbourne? Yes, maybe, but before doing so, wait awhile and go through the 5 tips given here and practice this plastering art form. You can be sure that you will do a wonderful job of plastering your walls perfectly, just like a plasterer with years of experience behind him.
DIY Plaster
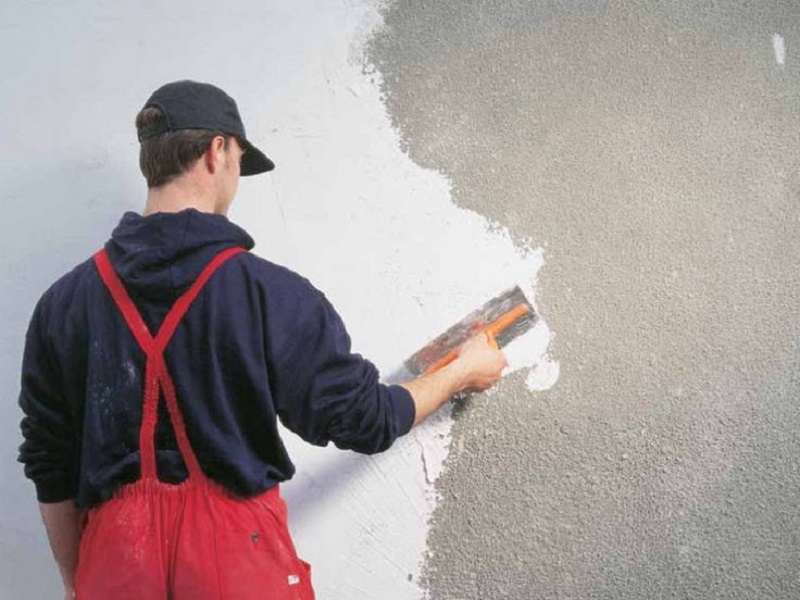
1: Preparing the Surface for plastering
This is a very crucial stage and the quality of plastering will depend largely on this aspect. Once you get this right, you can achieve a perfect plastering finish, one that won’t fall away in chunks after you complete it. After all, the purpose of plastering is to cover well any ungainly uneven surface. Plaster will not stick securely to a surface that is wallpapered, dusty or damp until you prepare the surface well. The first task is to remove any existing plaster, paper or dust before you even think of starting on the job. Next, treat the wall with a mixture of PVA glue and water. This will reduce suction of water from the plaster once it is applied and will not weaken the plaster skin coat. This mix must be applied immediately prior to plastering even when it is still wet. This will help bond the plaster well with the surface.
2: Getting the plaster mix right
This is not difficult but a few things should be followed scrupulously. Always add plaster to the water and not the other way around. Add plaster to the water in a small heap and mix well so that it is lump free. Keep on adding plaster and mix until it achieves the desired consistency. It should be firm enough to sit well on the trowel without sliding off. Another trick is to insert a stick into the mixture. If the stick stands on its own, you have got it perfectly done. Finally, use clean fresh water for the plaster mix.
3: Start with a small area
Talk to any experienced and well established plasterer like Coburg Plasterers in Melbourne and the first advice that you will receive is to start the DIY process on a limited surface area. This is because it is essential to get all the stages of plastering done quickly within the designated time from application of coats to wet trowelling to the final polishing. Hence your first attempt should be on an area where a single coat can be applied within 30 minutes. Do not spend a lot of time trying to get the first coat perfect, any imperfections can be smoothened out subsequently.
4: Cleanliness ensures a perfect finish
Make sure that you avoid any form of contamination even when you are racing against the clock to complete different stages of your plastering project. Clean the buckets and equipment as you go through the various stages of plastering as even the smallest fleck of dried plaster from the previous mix can cause pulls and ripples in the final finish. This can be very frustrating especially if you are in the late stages of the work. If the water you use is not clean enough to drink and the buckets and equipment cannot be eaten from, do not use them! Treat this as a rule of thumb.
5: Don’t over-polish the surface
In the final stages of plastering, do not over-polish the surface. Yes, it is possible to polish the surface until it is as smooth as glass but this will be counterproductive later. Paint and wall paper will peel off from highly polished surfaces and when this happens from certain areas while in others they stick on well, you will really be in trouble. Have a finish that feels like eggshells to the touch and you can be sure that you have got it right.
Follow these tips, practice on different surface areas and you will find that the art of plastering is no rocket science!


I’d like to thank you for the efforts you have put in writing this website.
I really hope to view the same high-grade blog posts from you in the future as well.
In truth, your creative writing abilities has inspired me to get my own, personal blog now 😉
If some one wishes expert view regarding running a blog after that i advise him/her to pay a visit
this web site, Keep up the fastidious job.
That is a good tip particularly to those new to the blogosphere.
Short but very precise information… Thank you for sharing this
one. A must read article!