Building a home sauna sounds simple until the actual design process begins. Suddenly, questions multiply: How big should it be? Where does the heater go? What wood works best? Which mistakes will cost thousands to fix later? The difference between a sauna that becomes a cherished daily ritual and one that feels like an expensive mistake often comes down to getting foundational design decisions right from the start.
Fortunately, successful sauna design is guided by clear and proven principles. Understanding layout fundamentals, choosing appropriate materials, and avoiding common pitfalls creates spaces that heat efficiently, feel comfortable, and last decades with minimal maintenance.
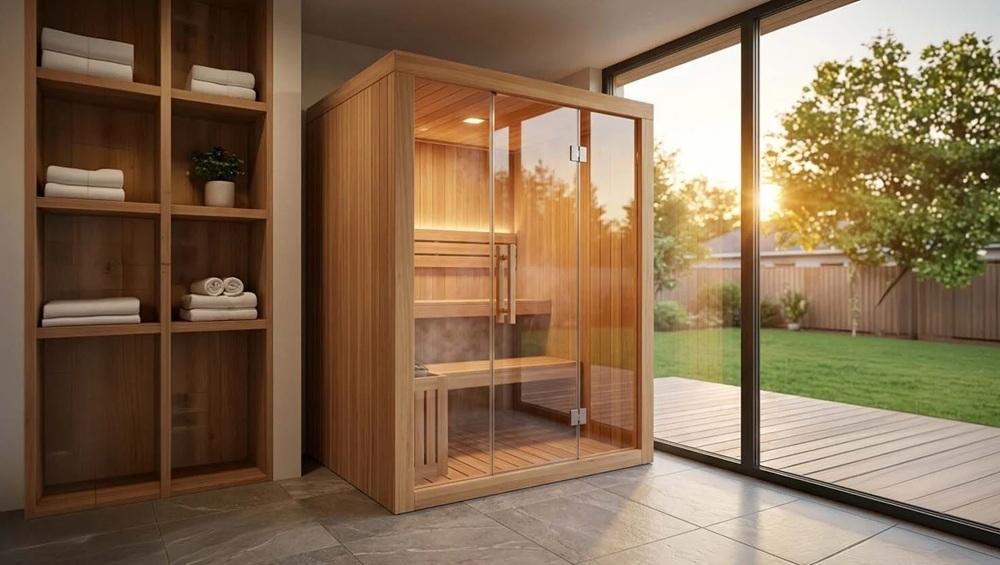
Whether converting a basement corner, building a backyard structure, or adding a sauna to a bathroom renovation, these core concepts apply universally.
Starting with Space and Size Considerations
Many first-time builders underestimate how important size is. A sauna that is too small can feel cramped and uncomfortable. One that is too large wastes energy by heating unused space and increases construction costs. The ideal size strikes a balance between seating capacity, heating efficiency, and overall construction cost.
A basic two-person sauna requires minimum interior dimensions of around 4 feet by 4 feet with 6.5-foot ceilings. It can seat two people on one bench, but the limited room often feels too tight for comfortable, everyday use. Most people find this cramped for regular use. Bumping up to 5 feet by 6 feet with 7-foot ceilings accommodates two bench levels and feels significantly more comfortable without excessive volume to heat.
Saunas designed for four people usually measure about 6 by 8 feet or 7 by 7 feet. These dimensions allow proper bench layout with adequate walking space. Anything larger than 8 feet by 10 feet starts requiring commercial-grade heaters and extended warm-up times that reduce practicality for regular residential use.
Many homeowners choose modern units such as HUUM sauna heaters because their compact design, large stone capacity, and efficient heat distribution work well in residential sauna layouts.
Ceiling height deserves careful thought. Lower ceilings (6.5 to 7 feet) heat faster and create cozier atmospheres, but can feel confining for taller users. Eight-foot ceilings accommodate most users comfortably but increase heating volume and costs. Going higher than 8 feet rarely makes sense unless architectural constraints demand it.
Strategic Layout and Bench Configuration
Bench design fundamentally shapes sauna experience. The upper bench should sit at a comfortable height for relaxing, about 38 to 42 inches from the floor. This elevation puts users in the hottest zone where heat stratifies near the ceiling. The lower bench serves multiple purposes: stepping access to upper benches, cooler seating for those who prefer less intense heat, and foot rests for upper bench occupants.
Bench depth matters tremendously for comfort. Shallow benches (16 to 18 inches) work only for upright sitting. Most people prefer lying down during sauna sessions, which requires a bench depth of at least 24 inches. Comfortable reclining demands 30 inches or more. Space constraints often force compromises, but skimping on bench depth is one of the most regretted decisions among sauna builders.
The heater location influences the entire room layout. Traditional placement in a corner maximizes usable bench space, but modern compact heaters with minimal safety clearances offer more flexibility. Positioning the heater where it doesn’t interfere with door swing, ventilation paths, or comfortable bench seating requires planning during the design phase rather than figuring it out during construction.
The location of the door might seem like a small detail, yet it impacts both circulation and heat efficiency. Inward-swinging doors consume precious interior space. Outward-swinging doors work better for most layouts. The door should never block the heater or force awkward movement patterns to reach seating.
Selecting the Right Materials
Material selection impacts both immediate construction costs and long-term satisfaction. Wood dominates sauna interiors for good reasons. It stays cool enough to touch even at high temperatures, absorbs and releases moisture well, and creates the aesthetic warmth people expect from saunas.
Wood Options for Interior Surfaces
Different woods bring distinct characteristics to sauna construction:
- Western Red Cedar: The most popular choice in North America for its natural rot resistance, pleasant aroma, and beautiful color. Cedar stays relatively cool to the touch and handles moisture excellently without treatment. Although premium grade costs more, it is often worth the investment for surfaces that remain visible.
- Nordic Spruce: Common in European saunas for its light color, minimal resin content, and affordable pricing. Spruce performs well in sauna conditions but lacks cedar’s natural decay resistance. It requires proper ventilation and maintenance to prevent moisture issues over time.
- Hemlock: A middle-ground option with subtle grain, light color, and decent durability. Hemlock costs less than cedar while outperforming spruce in moisture resistance. Some find the lack of aromatic qualities a drawback, while others prefer the neutral scent.
- Aspen or Poplar: These hardwoods stay exceptionally cool to the touch, making them ideal for bench surfaces where skin contact occurs. The light color and smooth grain create clean aesthetics. Higher costs limit Aspen to premium builds or bench-only applications.
Avoid pine, fir, or woods with high resin content. Resin pockets can heat up and burn skin, creating safety hazards and unpleasant surprises.
Insulation and Vapor Barriers: The Hidden Critical Elements
What happens behind beautiful cedar walls determines whether a sauna heats efficiently or struggles perpetually. Proper insulation and vapor barrier installation matter as much as any visible design element.
Standard home insulation values don’t apply to saunas. Walls need R-13 to R-19 insulation minimum. Ceilings demand even more R-30 or higher since heat rises and concentrates at the top. Mineral wool (rock wool) remains the preferred insulation material for its high-temperature tolerance and fire resistance, though properly installed fiberglass works adequately.
The vapor barrier creates the actual heat envelope. Heavy-duty aluminum foil (3-4 mil thickness) goes on the warm side of insulation between the insulation and interior paneling. Every seam must overlap at least 6 inches and be sealed with aluminum foil tape rated for high temperatures. This reflective barrier prevents moisture penetration while bouncing radiant heat back into the sauna.
Gaps around electrical boxes, vent openings, and wall penetrations undermine even excellent insulation. These thermal bridges leak heat constantly. Careful sealing during construction prevents energy waste and performance problems that plague poorly detailed saunas.
Ventilation: Getting Fresh Air Right
Proper ventilation prevents stuffiness while maintaining heat and humidity levels. The classic Finnish approach uses a passive system with an intake vent low on the wall near the heater and an exhaust vent high on the opposite wall or near the ceiling. This creates natural convection that circulates fresh air without mechanical fans.
The intake vent should measure roughly 4-6 inches square per 100 cubic feet of sauna volume. Position it 6-8 inches above floor level near the heater, where incoming cool air gets warmed before circulating. The exhaust vent should be approximately 1.5 times the size of the intake, placed diagonally opposite and near the ceiling to allow hot, stale air to escape.
Adjustable vents give users control over air exchange rates. More ventilation during sessions with multiple people prevents CO2 buildup and maintains comfort. Less ventilation in solo sessions preserves heat and humidity.
Electrical Requirements and Lighting
Sauna heaters demand dedicated electrical circuits. Most residential electric sauna heaters run on 240-volt power, similar to electric dryers or ranges. Smaller units (up to 6kW) might work on 30-amp circuits, while larger heaters require 40-50 amp service. This work requires a licensed electrician and should not be treated as a DIY project unless you are properly qualified.
Lighting should be minimal, indirect, and rated for high-heat wet locations. LED fixtures designed specifically for saunas work best. Position lights where they won’t shine directly in users’ eyes from bench positions. Soft, warm lighting creates ambiance while providing adequate visibility for safety.
Common Mistakes That Haunt Sauna Owners
Several errors appear repeatedly in home sauna projects, causing frustration that proper planning would prevent:
- Undersized Heaters: Choosing a heater that is undersized for the room can result in slow heating and difficulty maintaining consistent temperatures when the door is opened or additional users enter. Calculate cubic footage carefully and size heaters conservatively. It’s better to have slightly more capacity than needed.
- Poor Door Seals: Gaps around doors waste enormous amounts of energy. Quality sauna doors with proper weather stripping and magnetic seals maintain heat efficiently. Cheap hollow-core doors or inadequate sealing undermine otherwise good construction.
- Inadequate Floor Drainage: Moisture accumulates on sauna floors from perspiration and occasional water splashing. Without proper drainage or absorption, water pools create slip hazards and moisture problems. Slatted floors over drainage systems or highly absorbent floor materials prevent these issues.
- Forgetting Headroom on Upper Benches: Builders sometimes install upper benches too close to ceilings, forcing users to hunch or sit awkwardly. Leave at least 40 inches between upper bench surfaces and ceilings for a comfortable sitting posture.
- Skipping the Backrests: Uncomfortable backrest angles or complete absence of backrests reduces comfort significantly. Simple angled backrests attached to walls behind benches cost little but improve the experience enormously.
Bringing the Design Together
Successful home sauna design balances competing priorities: capacity versus heating efficiency, budget versus quality materials, compact footprint versus comfort. The best approach starts with clear priorities. What matters most: daily personal relaxation, family use, hosting friends, or post-workout recovery? Your main purpose should guide decisions about the sauna’s size, layout, and materials.
Working with experienced sauna builders or suppliers who understand residential installations prevents expensive mistakes. Homeowners researching heaters, sizing guidance, and installation considerations often explore resources at SaunaHeaters.com while planning their sauna projects.
The investment in quality design and construction pays back through decades of reliable use and genuine enjoyment. A well-designed home sauna becomes more than just an amenity. It turns into a wellness ritual that improves daily life in ways few other home improvements can match.
Author Bio
John is the YouTube lead and resident sauna enthusiast at SaunaHeaters.com. He creates educational videos and written guides covering sauna health benefits, proper installation, ventilation, and best practices. His goal is to make sauna ownership simple, safe, and approachable through clear, practical guidance.