Why Refinish Hardwood Floors Yourself?
Refinishing hardwood floors can drastically improve the look of your home and make it more inviting. When done correctly, refinishing your floors can also increase the value of your property. However, instead of hiring a professional to do it for you, why not take on the task yourself? Not only will you save money, but you’ll also gain valuable experience and knowledge in how to refinish hardwood floors. All you need is to go to a hardwood flooring store in Hamilton and you can do this job.
Doing the work yourself will give you complete control over how your floor looks when finished. You can choose the exact stain colour and finish that best fits your style and needs. Plus, with a little practice, you’ll be able to achieve a beautiful result that rivals any professional job.
Another benefit of refinishing your hardwood floors yourself is that it’s much quicker than having someone else do it. Without having to wait on contractors or materials delivery, you can get started right away and have everything ready in no time. Additionally, if there are any unexpected issues during the process, you have full control to adjust as needed without waiting for someone else’s schedule or approval.
If you’re looking for a great way to save money while still getting an amazing-looking floor, consider refinishing it yourself! With some patience and practice, you’ll be able to sand and refinish those hardwood floors like a pro in no time at all!
What You Will Need
Before you get started, make sure to have the right tools and materials on hand. You will need a drum sander, sandpaper in various grits, a vacuum cleaner, tack cloths, wood filler, stain (if desired), polyurethane sealer, brushes or rags for staining and sealing and painter’s tape. Additionally, you should also wear eye protection and a dust mask while sanding your floors as these can get very dusty.
You may also want to consider renting a professional-grade floor buffer if you don’t own one yourself. This will help smooth out the sanded surface more quickly than hand-sanding could ever do. Floor buffers are typically available from home improvement stores or tool rental companies.
Once you have all the necessary tools and materials ready to go, it’s time to start refinishing your hardwood floors! With patience and practice you should be able to achieve an amazing result that rivals any professional job – so get to it!
Preparing the Room
Before you start sanding and refinishing your hardwood floors, it is important to properly prepare the room. Start by removing all furniture and decorations from the area so that you can access every corner of the room. Then, use a vacuum cleaner to thoroughly clean the floor and remove any dust or debris. After that, use painter’s tape to cover vents, baseboards, door frames and other objects that you don’t want to get sanded or stained. Finally, put down plastic sheeting over the entire area to make cleanup easier once you’re done with the project. This will also help reduce airborne dust from getting into other parts of your home.
Removing Furniture and Rugs
Removing furniture and rugs is an important step in the process of sanding and refinishing hardwood floors. Begin by taking any furniture, area rugs, and other decorations out of the room. Once everything has been removed from the space, use a vacuum cleaner to thoroughly clean the floor, removing any dust or debris that may have accumulated. You can also use a damp mop to really get into the corners and remove any stubborn dirt or grime. If you’re working with larger pieces of furniture that cannot be removed, such as couches or dressers, cover them with plastic sheeting before starting your project. This will help reduce airborne dust from getting on them during sanding.
Covering Surrounding Areas with Plastic Sheetings
Before you begin sanding and refinishing your hardwood floors, it’s important to cover any surrounding areas with plastic sheeting. This is especially important if you’re working in a room with carpet or other types of flooring. Using plastic sheeting will help prevent dust and debris from getting on these surfaces while you’re sanding the wood. Begin by tapping the edges of the plastic sheeting to the baseboards around the perimeter of the room. Make sure everything is sealed off tightly so no dust can escape. If there are any windows, doors or vents in the area, be sure to cover them as well. Once everything has been secured, double-check that all surrounding areas are completely covered before beginning your project. By covering all surrounding areas with plastic sheetings, you can rest assured knowing that your carpets and another flooring will remain clean and dust-free during your sanding and refinishing project!
Removing Old Finish with a Drum Sander
Removing the old finish from your hardwood floor is an important step in the sanding and refinishing process. To do this, you will need to use a drum sander. Begin by attaching the appropriate sandpaper to the sander. Make sure the sandpaper has a grit level that is suitable for your particular type of wood. Once you have attached the sandpaper, start at one corner of the room and slowly guide the sander across the wood in straight lines. As you move along, be sure to follow a pattern so that your entire floor is evenly covered. When you are done, vacuum up all of the dust and debris that has collected on your hardwood floors. After completing this step, you can move on to applying a new finish to your floors!
Sanding the Floor
Sanding the hardwood floors is the next step in refinishing your floors. Begin by using a floor sander with an appropriate grit level for your type of wood. Start at one corner of the room and move the sander in straight lines across the floor. As you sand, be sure to follow a pattern so that you cover all of the surface areas evenly. You may need to use multiple passes with different grit levels to get a smooth finish. Once you are done sanding, be sure to vacuum up all of the dust and debris that has been created. After completing this step, you can now apply a new finish and enjoy your newly refinished hardwood floors!
Starting With Coarse Grit Sandpaper
When starting to sand your hardwood floors, it’s important to start with coarse grit sandpaper. Coarse grit is best when removing old finishes or deep scratches in the wood. The larger grains of the coarse paper will remove more material quickly and allow you to get into tight corners and other hard-to-reach areas. When using this type of paper, be sure to use light pressure so as not to damage the wood. Once you have finished with the coarse sandpaper, move on to a medium grit before finishing up with a fine grit for a smooth finish. By taking your time when sanding each stage and using the proper safety equipment, you’ll be able to refinish your hardwood floors like a pro.
Working up to Finer Grits of Sandpaper
Once you’ve finished sanding with the coarse grit, it’s time to move on to finer grit. Start with medium-grit sandpaper and work your way up to fine-grit sandpaper. As you move up in the grits, apply light pressure so as not to damage the wood. When using finer paper, you will be able to remove scratches and other imperfections that were left behind by the coarser papers. Make sure that you are taking your time when sanding each stage and paying attention to detail. When finished with the finest paper, make sure that all of your hardwood floors have been properly sanded before moving on to staining or finishing them. By taking your time and paying attention to detail, you’ll be able to refinish your hardwood floors like a pro!
Vacuuming Up Sawdust
Once you’ve finished sanding your hardwood floors, it’s important to vacuum up any sawdust and debris before moving on to the next step. Start by vacuuming the entire area with a shop vacuum or other type of vacuum that has a HEPA filter. The filter will help to trap the dust particles so they don’t become airborne and irritate your eyes and nose. Once all the sawdust is cleaned up, use a damp mop or rag to give the floor a final clean before you begin staining or finishing it. Make sure to go over any corners or crevices that may be difficult to reach with a shop vacuum. Once completed, allow the floor to dry thoroughly before applying any stain or finish.
Applying Wood Stain
Applying wood stain (optional) is an important step in refinishing hardwood floors. It can give the floor a new look and add character to the room. To apply the stain, first, choose from a variety of colours and finishes to suit your style. Next, use a brush or roller to evenly spread the stain over the entire surface of the floors. Allow it to dry for several hours before applying any protective sealant such as polyurethane or lacquer. Finally, use a soft cloth to buff out any excess stain that may have been left behind.
Sealing the Floor
Once the stain has been applied and allowed to dry, it’s time to seal your hardwood floors. Depending on the type of finish you are looking for, there are a variety of sealants available. For a glossy finish, polyurethane or lacquer should be used. For a satin sheen, try using a water-based sealant. If you want an even more durable finish, opt for a penetrating oil-based sealant. Regardless of which product you choose, make sure to apply it evenly with a paintbrush or rag and let it dry for 24 hours before walking on the floor. Once sealed, your hardwood floors will be ready to enjoy!
Buffing the Floor
Buffing the floor is an important step for achieving a smooth, glossy finish on your hardwood floors. To start, use a buffing machine to apply fine grit sandpaper to remove any remaining residue from the previous coats of polyurethane. This ensures a clean surface to work with and will help the new coat adhere better. After sanding, use a vacuum or broom to remove all dust particles from the floor. Then, using a soft cloth buff the floor in circular motions until it has a nice shine. Make sure to not over-buff as this could damage the wood’s surface and create an uneven finish. Once finished, you can apply one or two more coats of polyurethane as directed by manufacturer instructions to protect and seal your floors.
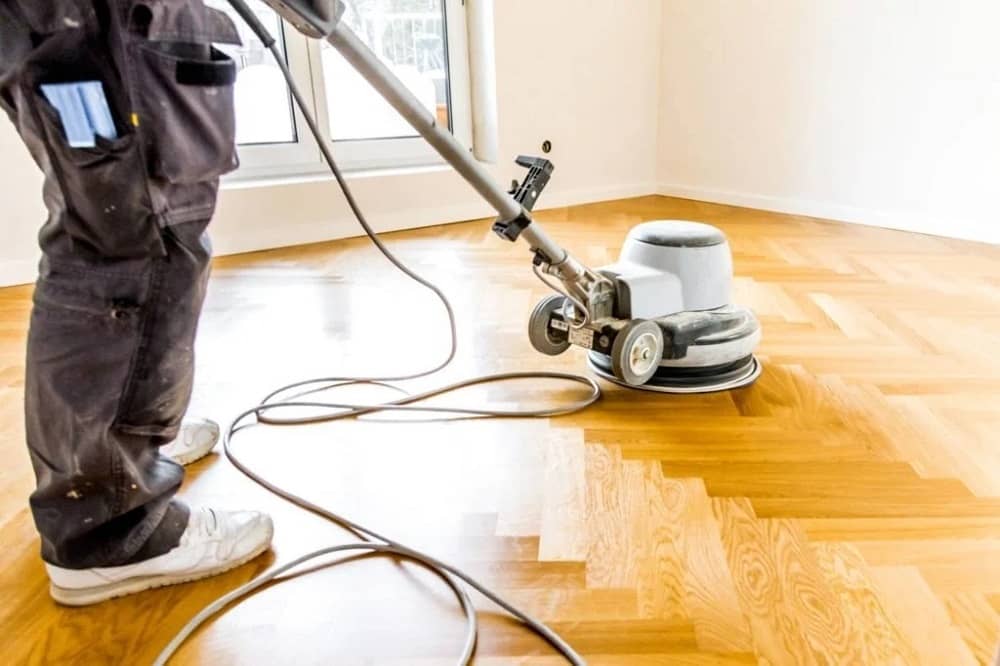
Using a Floor Buffer if Available
If you have access to a floor buffer, it can be a great tool to help speed up the refinishing process. Floor buffers are typically large machines that oscillate back and forth across the floor as they spin. This helps create a more even sanding pattern with less effort compared to hand sanding. Before using the buffer, make sure it is equipped with the right grit of sandpaper for your project. Start by running the machine in one direction only and then switch directions on subsequent passes. Be sure to use slow, consistent motions while buffing; this will ensure an even finish without any scratches or gouges on your wood floor. After buffing, use a vacuum or broom to remove all dust particles from the floor and then apply one or two coats of polyurethane as directed by manufacturer instructions for best results.