Have you ever tried to open a window only to find it stuck, jammed, or sliding down the moment you let go? Does your beautiful period home have windows that rattle in their frames or refuse to stay open without a trusty wooden spoon propping them up? If you’re nodding along, chances are your sash window cords have seen better days.
Sash windows are a gorgeous feature in many Australian homes, particularly those charming heritage properties and federation-style houses we’re so fond of. But like anything with moving parts, they need a bit of love and attention to keep working smoothly. The good news? Understanding how these windows work and knowing when to tackle sash window repairs can save you a fair bit of money and frustration.
In this guide, we’ll walk you through everything you need to know about window sash cord repair. You’ll learn how sash windows actually work, what causes those cords to fail, and whether you can fix them yourself or need to call in the professionals. We’ll also cover the all-important question of how much does sash window restoration cost, plus tips for keeping your windows in top shape for years to come. Let’s get stuck into it.
Understanding Your Sash Window: How the Cord System Works
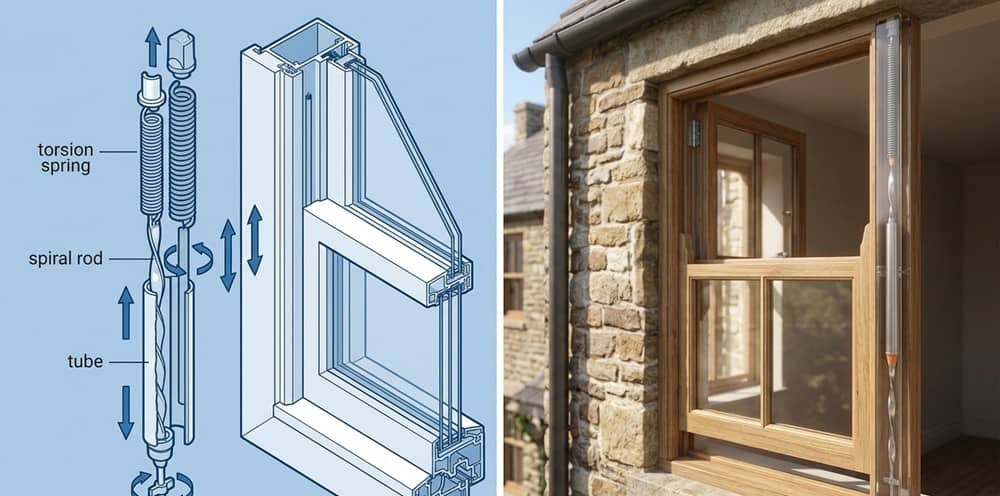
Before you grab your tools, it helps to understand what you’re actually dealing with. A sash window is a clever bit of engineering that’s been around for centuries. The basic design features two moveable panels (the sashes) that slide vertically within a frame. Each sash is connected to counterweights hidden inside the frame via cords that run over pulleys.

The Anatomy of a Sash Window
Your typical sash window has several key components working together. The sashes themselves are the glazed panels you see. These sit in channels called staff beads and parting beads, which keep them running smoothly. Inside the frame, you’ll find pocket covers that give you access to the weights. The pulleys sit at the top of each channel, and the sash cords connect everything together.
What Do Sash Cords Actually Do?
The window sash cord is essentially the muscle of the operation. These cords attach to each side of your sash, run up and over the pulleys, then connect to the counterweights hidden in the frame. When everything’s working properly, the weights balance the sash perfectly. This means your window stays exactly where you put it no props required.
Signs Your Window Sash Cord Needs Repair
How do you know when it’s time for sash cord repairs? The most obvious sign is a sash that won’t stay up on its own. You might also notice one side of the window dropping faster than the other, creating an uneven gap. Sometimes you’ll hear a thud from inside the frame that’s the sound of a weight hitting the bottom after its cord has snapped. If your window feels unusually heavy to lift, that’s another red flag.
Why Do Sash Cords Break? Common Causes of Wear and Damage
Understanding why sash cords fail can help you prevent future problems. These cords work hard every time you open and close your windows, so wear and tear is inevitable.
Age and Natural Deterioration
Traditional sash cords were made from cotton or hemp rope, materials that naturally break down over time. If your home is several decades old and still has original cords, they’re likely brittle and ready to snap. Even high-quality cords typically last only 15 to 30 years with regular use.
Environmental Factors in Australian Climates
Australia’s climate can be particularly tough on sash windows. Intense UV exposure degrades cord fibres faster than in milder climates. High humidity in coastal areas can cause moisture damage, while extreme heat makes cords dry and brittle. Melbourne’s famous four-seasons-in-one-day weather doesn’t help either, with constant expansion and contraction stressing the entire system.
Poor Previous Repairs or Incorrect Cord Materials
Sometimes the problem stems from earlier repair attempts. Using incorrect cord thickness, inferior materials, or improper installation techniques can lead to premature failure. Synthetic cords that are too slippery won’t grip the weights properly, while cords that are too thick won’t run smoothly through the pulleys.
Can You Repair a Sash Window Cord Yourself ? DIY vs Professional Repair
The honest answer is: it depends. Fixing a sash window is certainly achievable for confident DIYers, but it’s not always straightforward.
When Fixing a Sash Window is a DIY Job?
If you’re reasonably handy with tools and patient, replacing a broken sash cord is manageable. The job is well-suited to DIY when you’re dealing with a single broken cord, the window frame is in good condition, and you can access the weight pockets without damaging historic timber. You’ll need basic carpentry skills and a few hours to spare.
When to Call in a Professional for Sash Window Repairs?
Some situations call for expert help. Consider professional sash window repair when multiple cords need replacing, the frame shows signs of rot or damage, the pulleys are seized or broken, or you’re dealing with a heritage-listed property where incorrect repairs could cause issues. Professionals also make sense when you simply don’t have the time or confidence to tackle the job yourself.
Step-by-Step Guide to Window Sash Cord Repair
Ready to give it a go? Here’s how to repair sash window cord yourself.
Tools and Materials You’ll Need
Gather these items before you start: a sharp utility knife, screwdrivers (flat and Phillips head), a hammer, pliers, replacement sash cord, scissors, and a small weight or fishing sinker for threading the cord. You’ll also want masking tape, a pencil, and something to catch any debris.
Removing the Sash Safely
Start by removing the staff bead the innermost strip holding the lower sash in place. Carefully prise it away using a wide chisel or stiff putty knife. Once removed, swing out the lower sash and disconnect any remaining cord. For the upper sash, you’ll need to remove the parting bead as well.
Accessing and Replacing the Broken Cord
Locate the pocket covers on each side of the frame these are small panels held by screws or friction. Remove them to access the weights inside. Retrieve any dropped weights and remove old cord remnants from both the weights and sash. Tie your new cord to a small weight, feed it over the pulley, and pull it through the pocket. Attach one end to the sash weight and the other to the groove in the sash itself.
Reassembling Your Sash Window
Test the balance by lifting the sash to various heights it should stay put without assistance. Once you’re happy, replace the pocket covers, refit the parting bead, slide in the upper sash, then reinstall the lower sash and staff bead. Take your time here to avoid damaging the beads.
Choosing the Right Sash Cords for Windows
Not all sash cords for windows are created equal. Making the right choice now will save you from repeat repairs down the track.
Types of Sash Cord Materials
Traditional waxed cotton cord remains popular for heritage restorations and offers good grip and durability. Pre-stretched synthetic cords provide excellent longevity and resist moisture damage. Braided polyester is another option, offering strength without excessive stretch. For wood window sash repair on period properties, many specialists recommend sticking with cotton for authenticity.
What Size Cord Do You Need?
Sash cord typically comes in sizes ranging from 6mm to 10mm. The correct size depends on your pulley wheel diameter and weight hole size. As a general rule, measure your existing cord or check the pulley groove. Using cord that’s too thick will cause binding, while cord that’s too thin won’t grip properly and may wear faster.
Sash Window Maintenance Tips for Long-Lasting Performance
Prevention beats cure every time. Regular sash window maintenance extends the life of your cords and keeps everything running smoothly.
Regular Inspection and Cleaning
Check your cords twice yearly for fraying or wear. Keep pulleys clean and lightly lubricated with dry silicone spray. Wipe down channels to remove dust and debris that causes extra friction.
Preventative Care to Avoid Future Repairs
Avoid slamming sashes closed, as this stresses cords unnecessarily. Address sticking windows promptly before you’re tempted to force them. Consider having all cords replaced together when one fails—if one has deteriorated, others likely have too.
Should You Repair Sash Windows or Replace Sash Windows Entirely?
This decision depends on your specific circumstances. Repair sash windows when the frames are structurally sound, the windows have heritage value, or the budget is a concern. Consider whether to replace sash window units entirely when frames show extensive rot, you want modern double-glazing, or repairs would cost more than 60% of replacement value. Often, restoring sash windows offers the best combination of value, character, and sustainability.
Final Thoughts: Restoring Sash Windows for Smooth, Reliable Operation
Sash windows remain one of the most elegant window designs ever created. With proper care and timely repairs, they’ll provide decades more service while maintaining your home’s character and charm. Whether you tackle window sash repairs yourself or call in the experts for sash cord replacement, understanding how these beautiful windows work puts you in the best position to keep them functioning perfectly.
Remember, a broken sash cord isn’t the end of the world it’s a normal maintenance issue with straightforward solutions. The investment you make in repairing double hung window sash cord work today protects both your home’s value and your daily comfort. So don’t put up with that rattling window any longer. Grab your tools or pick up the phone, and get those sashes gliding smoothly once again. Your home will thank you for it.